
Place II
What if our everyday objects had curious behaviors? What if they had personalities, reactions to their environments, or memories of their own lives, from creation to disposal?
I was interested in this strange world, and conceived of a kettle that pours light. And not just a beam of light, but a light the flowed according to the topography of its birthplace.
This project was created during the Gray Area Creative Code Immersive, and exhibited in the Gray Area Artist Showcase in New Art City during San Francisco Design Week. Below is a bit about the process of utilizing Processing to create generative art, Arduino to receive sensor inputs, Syphoner, MadMapper, and good ol’ fashioned 3-D printing to bring this concept to life.
About the software
I’ve been quite inspired by generative art, and a great resource is the website of the Generative Design, Creative Coding on the Web book, which includes a ton of beautiful examples along with direct links to their code in P5.js.
I was also helped along by the wonderful Daniel Shiffman whose video tutorials take you through creative coding in P5 and Processing in a most engaging way. And actually, his coding challenge on Perlin Noise Flow Fields forms the vast majority of the basis of my code.
Perlin noise, introduced to me by my classmate Ella, is a type of computational “noise” that appears less random and computer-like, and more from the realm of nature. This helps enable natural-feeling smoke and water flows, for example.
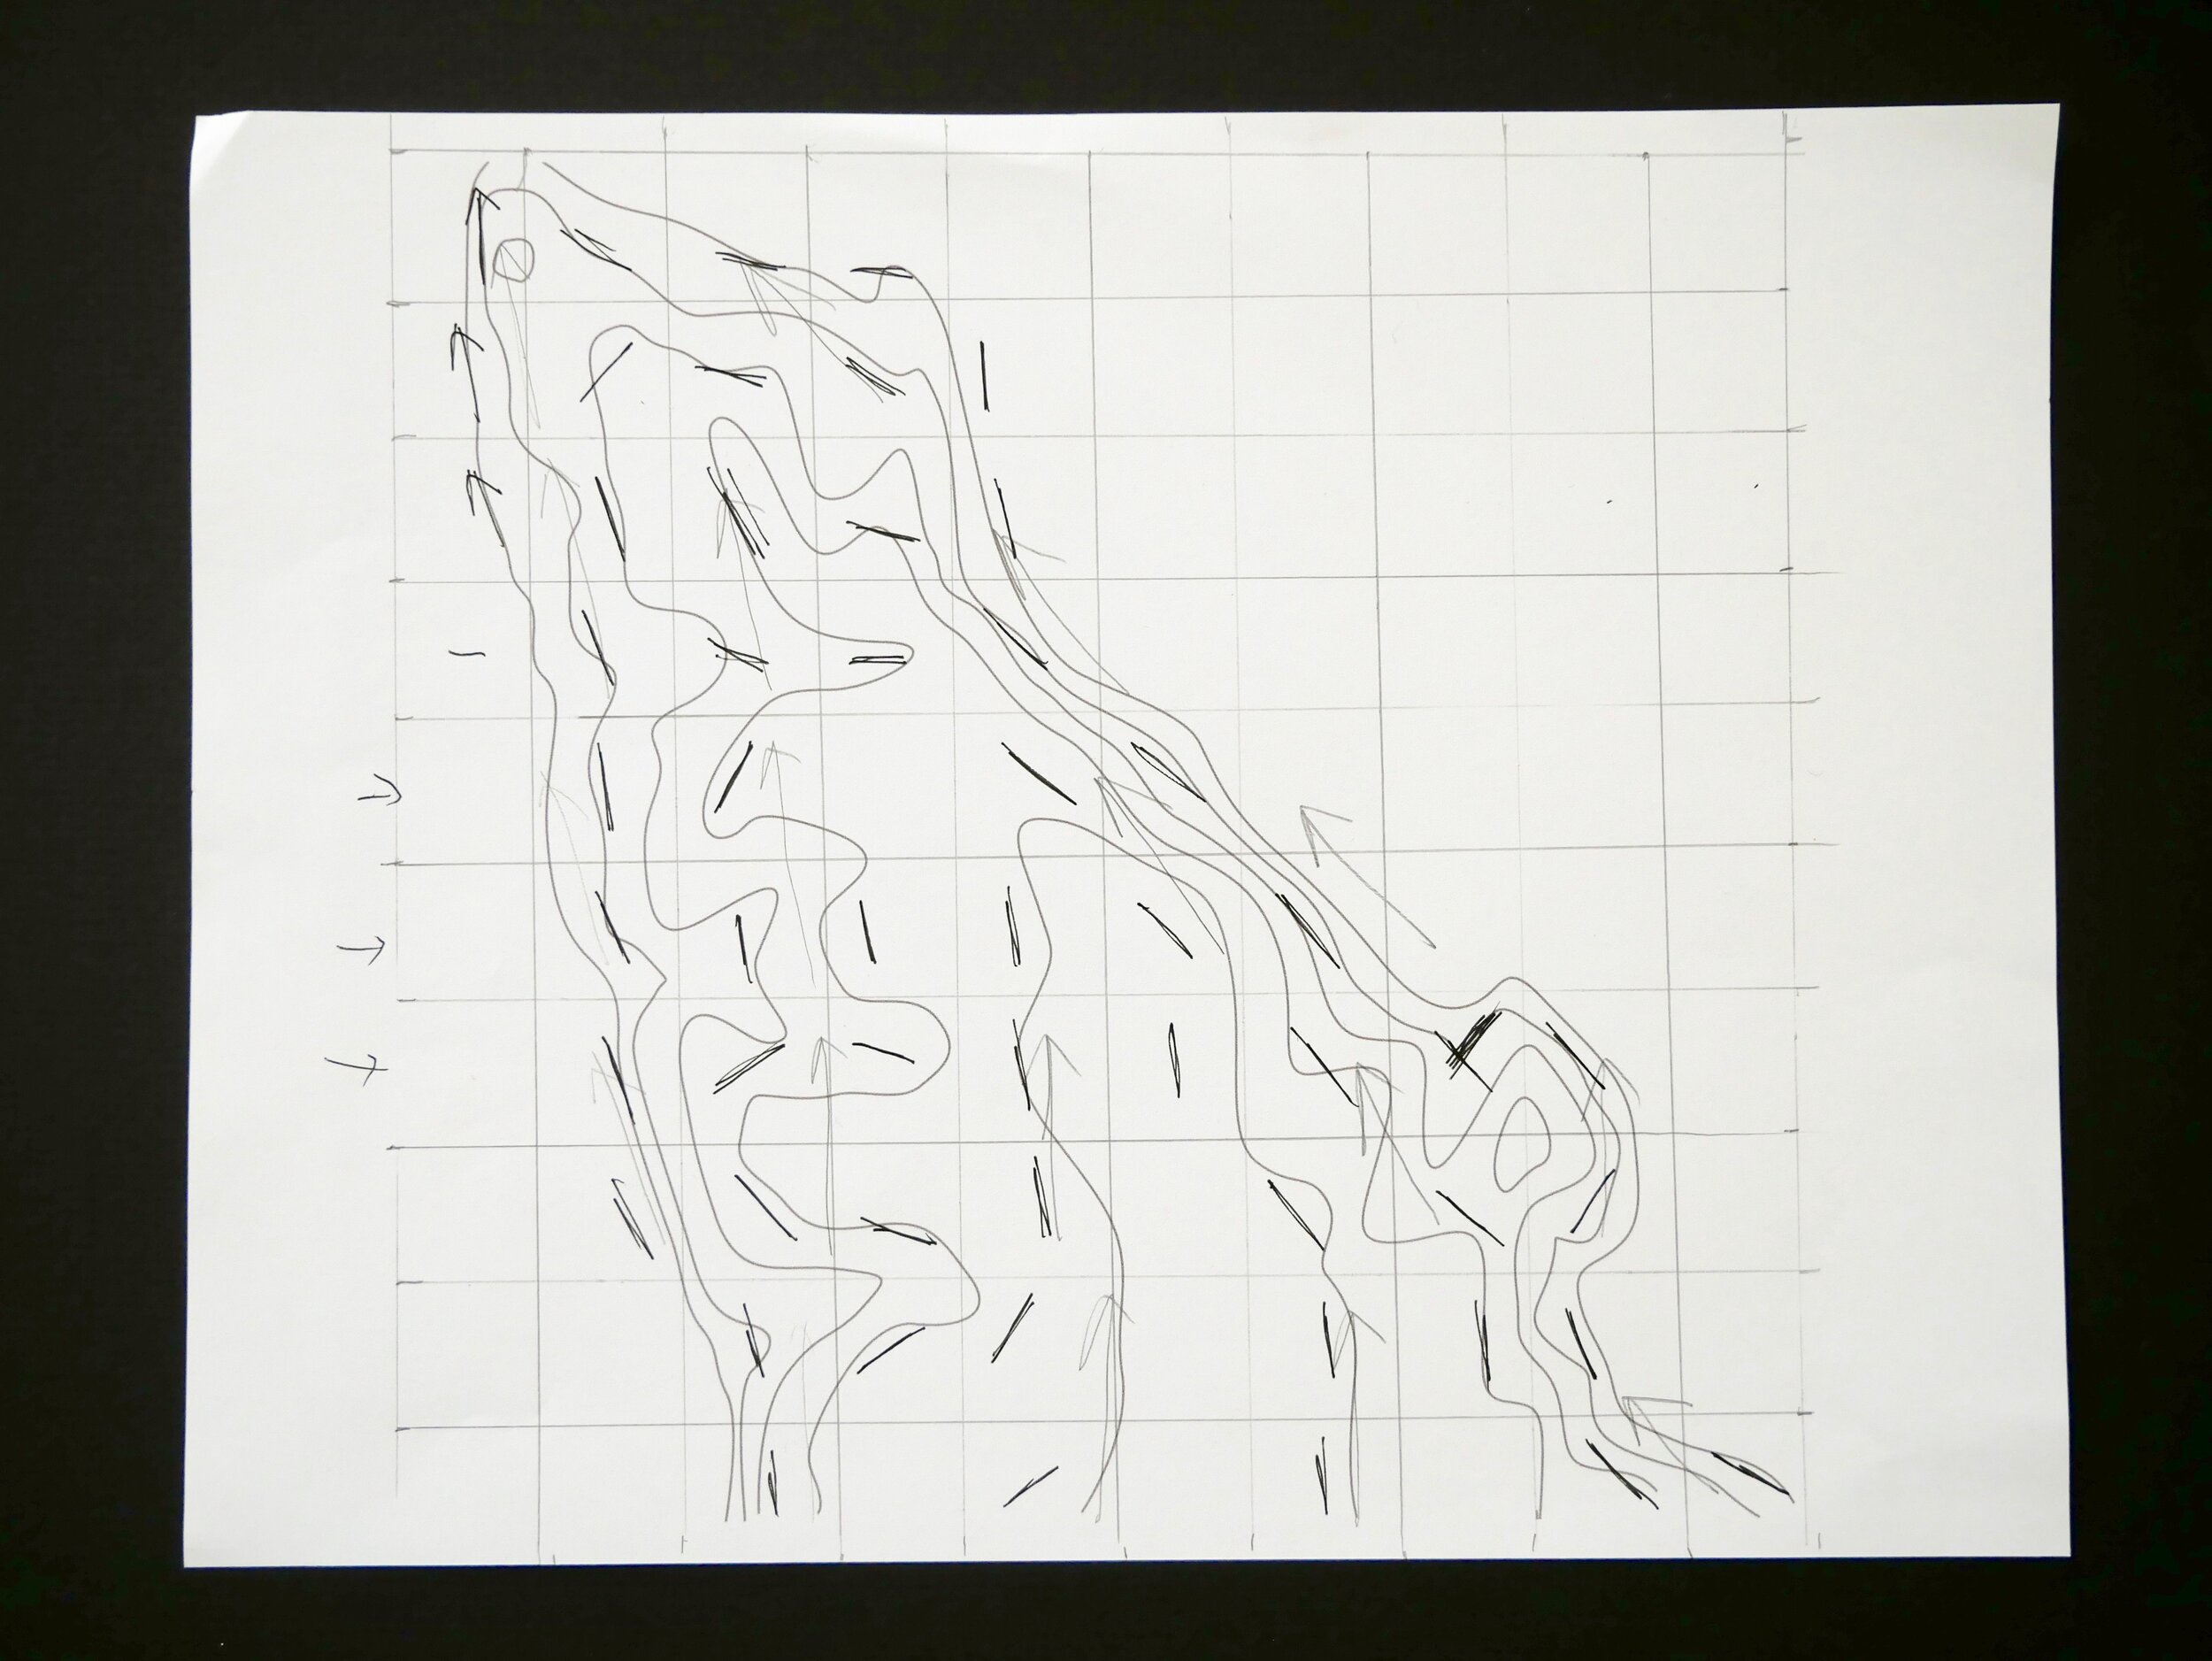
To create the Perlin noise flow field, you create a grid of vectors, and through this field of vectors, particles pass through, “guided” by the direction and magnitude (length) of the vectors. In Dan’s (can I call Shiffman, Dan?) tutorial, the vectors are created completely randomly with Perlin noise, but I wanted these vectors to be based on topographic contour lines.
I know there must be a database of contour lines that one can pull from and do this process computationally, but for time and simplicity I used pencil and paper and sketched out an analog grid over the topography of nearby Torrey Pines State Park (yes, not my first project inspired by Torrey Pines!). Then I hard-coded the vector angles, allowing for a noise-generated variance.
I first programmed this interaction in P5.js, because that’s how the tutorial went, but then I switched to Processing, because it’s easier to link to Arduino.
Arduino’s role is to take in two inputs: the tilt of the kettle, and the distance the kettle is from the table. That’s because the light should only “pour” when the kettle is near or at horizontal. And like real water, the stream of water that comes out also varies according to the height of the kettle. So that part of the Processing code looked like this:

When the kettle becomes horizontal, a black square on top of the sketch simply becomes more transparent, revealing the animation underneath. And the closer the kettle is to the table, the shorter the magnitude is of the vectors. So the particles float around rather aimlessly.
But as the kettle is raised, the particles flow in a more determined direction - along the topographic contour lines -, because the vector magnitude increases.
About the hardware
Now onto the kettle.
I originally looked around the house for a kettle I could repurpose, but I needed something that could fit the specific hardware, which had specific dimensions, so it was most practical to design and 3-D print one - and that way the form could look the way I wanted as well. Here’s a sketch mapping out the required dimensions based on the hardware I had.
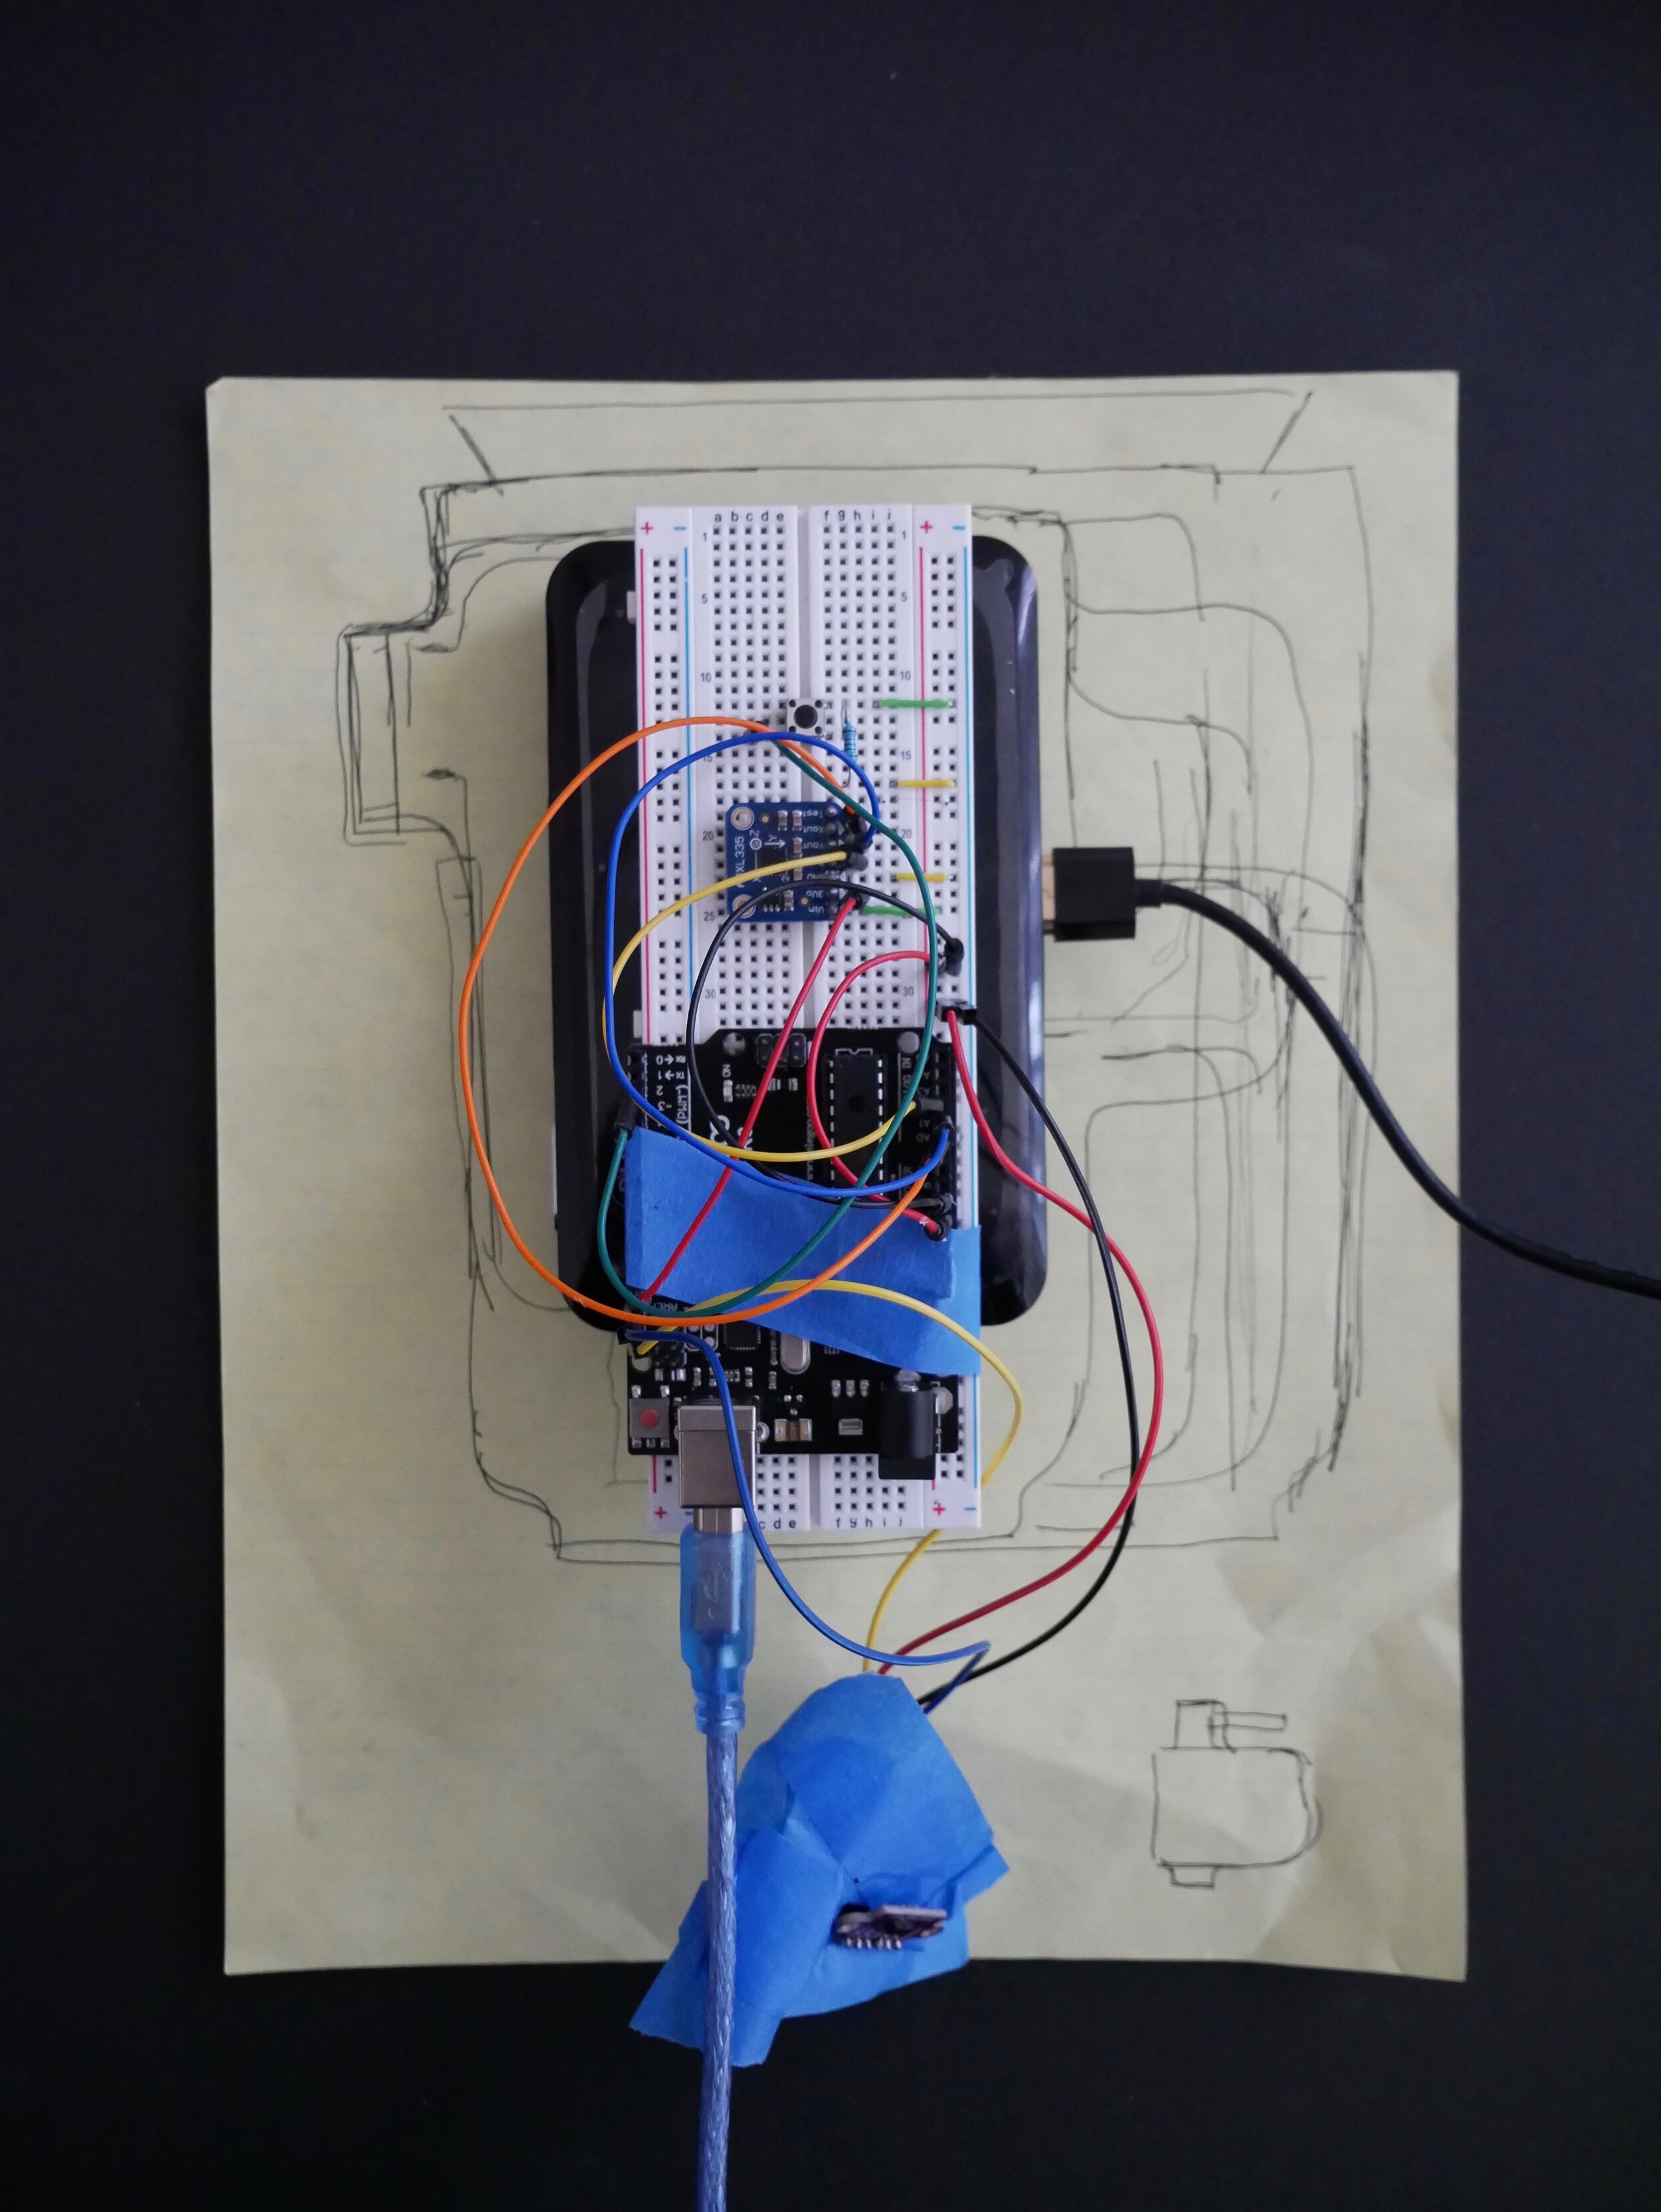
And here’s a breakdown of what is inside the kettle. The Arduino, accelerometer, and projector were things I already got for class. I additionally got the Time of Flight sensor, because I had previously played around with the ultrasonic sensor that came in the Elegoo starter kit, but it updated with such a jerky fashion, I knew I didn’t want to use it for this project. The VL53L0X Time of Flight sensor updates in a much more rapid and smooth way.
And the cork top is from a company which has the best name, WidgetCo! Where else to turn when one needs a giant cork stopper? With the exact dimensions from the WidgetCo website, I could design the kettle opening to fit. In everything goes…
And some bubble wrap and blue tape to hold everything in place.

Another advantage of designing the kettle myself and printing it (through local supplier Incept3D), is that I could design in things like the hole for the distance sensor and vent holes aligning with the projector's vents. Our projection mapping teacher Taurin Barrera made a point to emphasize that air ventilation is super important for projectors to function - so glad he did.
I also could design in holes for the cables - I had a USB cable coming out the bottom for the Arduino, and an HDMI cable coming out of the handle for the projector. It should be possible to do this project without cables. I could have gotten a projector that receives input wirelessly (and my projector is already battery-powered), and instead of an Arduino, I could have used my ESP32 Feather Board which uses Wifi and Bluetooth, and can be connected to a battery pack. I suppose a Raspberry Pi would also work. But those would have all taken more rewiring, recoding, learning, and/or buying new equipment, and I used what I had.
And finally it’s about getting the Processing output through to the projector. This was the simplest step! Syphoner is the intermediary that connects lots of different programs. I just clicked on my Processing sketch to select it as my input, and then in MadMapper, the projection mapping software, I selected Syphoner as the input. Then in MadMapper I changed the shape and orientation of the animation to look more like a light flow from the kettle.
Special thanks to Dan Shiffman for all of the coding tutorials, especially the Perlin Noise Flow Field tutorial, and Niki, Taurin, and Stephanie Andrews for help.